Creating Modules and Assets
You can create a metadata representation of a business operation running in a remote data source in the OpenLegacy CLI. The metadata representation of one business operation is called an asset.
In this tutorial, you will learn how to create modules, add assets, test their connectivity, and finally push them to the OpenLegacy Hub.
Creating modules and adding assets are steps in the process of API development.
Before you begin setting up modules and assets, get started with OL Hub.
Step 1: Create a module
The first step after you logged in to the OL Hub is the creation of the module folder. A module contains the resources and the configuration data needed to extract one or multiple assets from a single data source. The module configuration file (module.json) specifies the module connector type and the connection properties to the data source.
To create the module, you have to specify which connector the module activates. A connector is an entity that includes all the logic
necessary to interface with a given data source type. Among its responsibilities are analyzing the data source contents, understanding its particular format and syntax, and parsing it to a readable JSON format.
Via the CLI:**
To learn which connectors are installed in your local OL CLI, perform the following:
- Run the ol list connectors command:
> ol list connectors$ ol list connectors- Review the displayed connectors table
After you know which connector your module will activate, you can execute the ol create module command with the connector name as the value of the command’s connector option.
- Run the ol create module command:
> ol create module <module_name> --connector <connector_name>$ ol create module <module_name> --connector <connector_name>For example, to create a CICS banking account API:
> ol create module --connector mf-cics-cobol accounts-cics$ ol create module --connector mf-cics-cobol accounts-cicsAfter you run ol create module with a specified connector, OL CLI will check if you have the connector installed on your local station. If you do not, OL CLI will automatically download the connector from the OL Hub solution center.
However, if the version of your OL CLI is not compatible with the connector's current version, you will be prompted to upgrade your OL CLI version first.
After the successful completion of the command, review the new module.json inside the new module folder.
- Go to the new module folder (the name of the new folder is the value of the name option of create module.)
> cd [module_name]$ cd [module_name]- Open module.json located at the module folder root:
{
  "id" : "020c6522-1ee5-49de-8722-aba917bc5c87",
  "moduleName" : "cics1",
  "connectorName" : "mf-cics-cobol",
  "connectorVersion" : "1.36.0",
  "profiles" : {
    "$default" : { }
  },
  "type" : "mainFrameRpc",
  "dtVersion" : "1.36.0"
}
Via the UI
From the Modules list page, click on the 'Create Module' button.
It will open the Connectors selection Page:
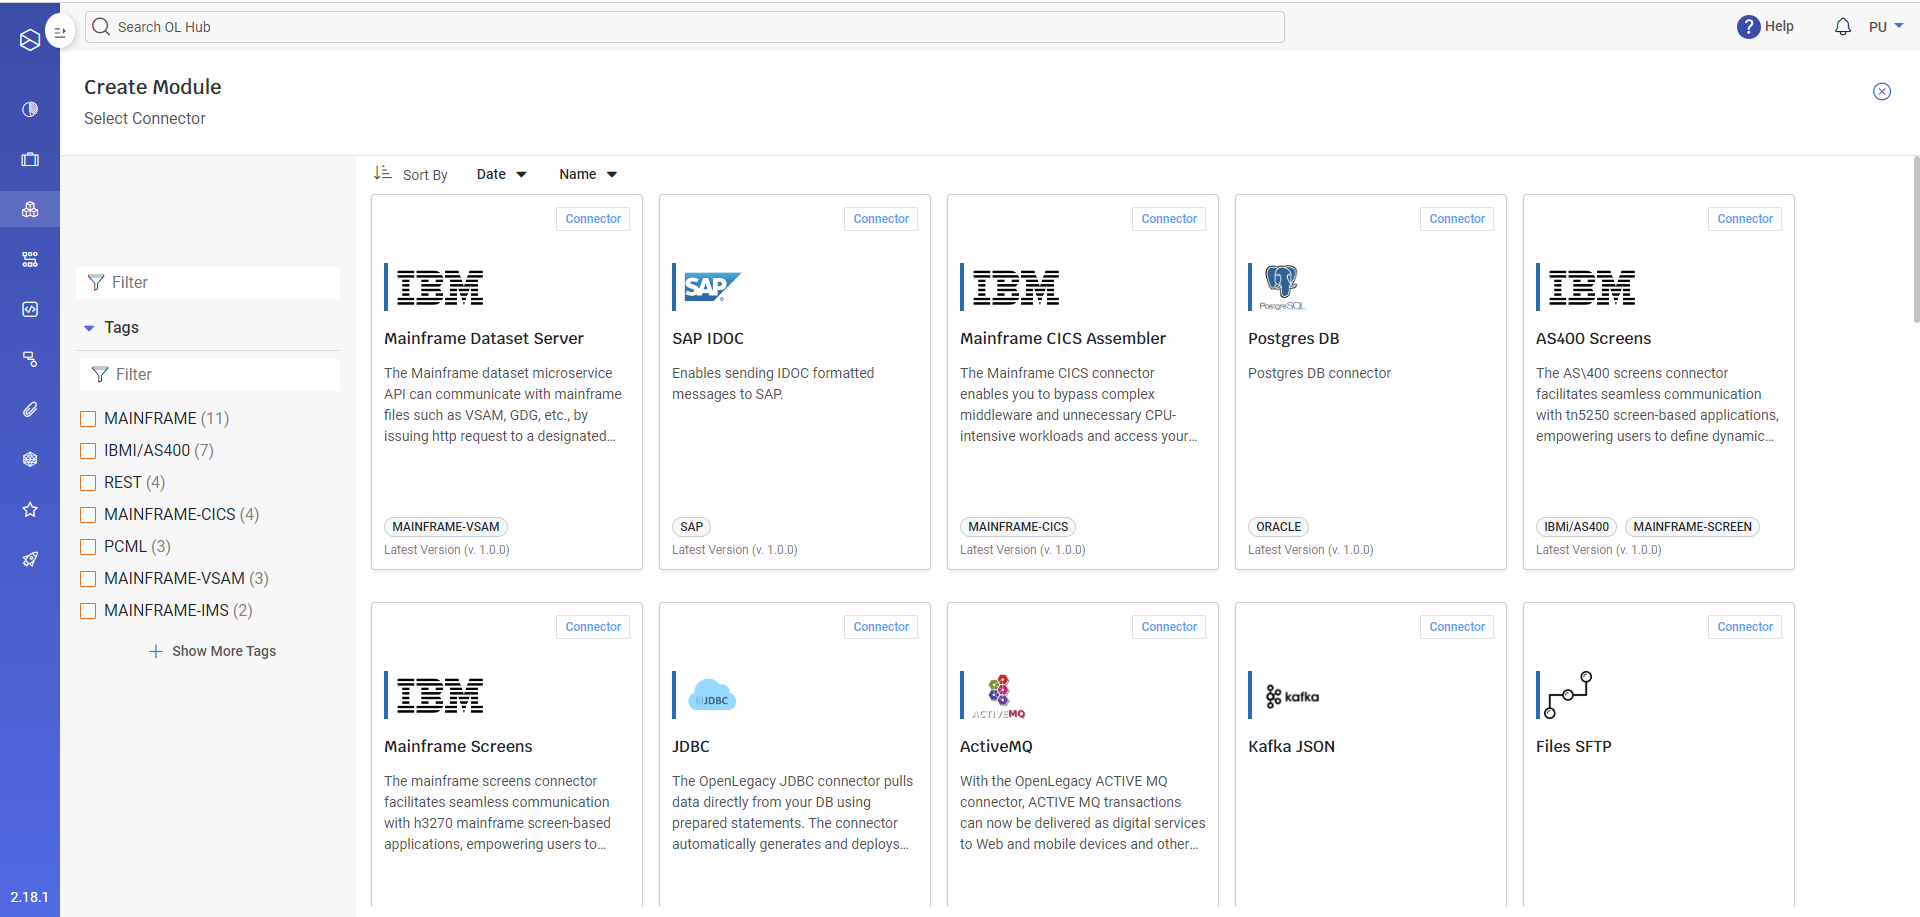
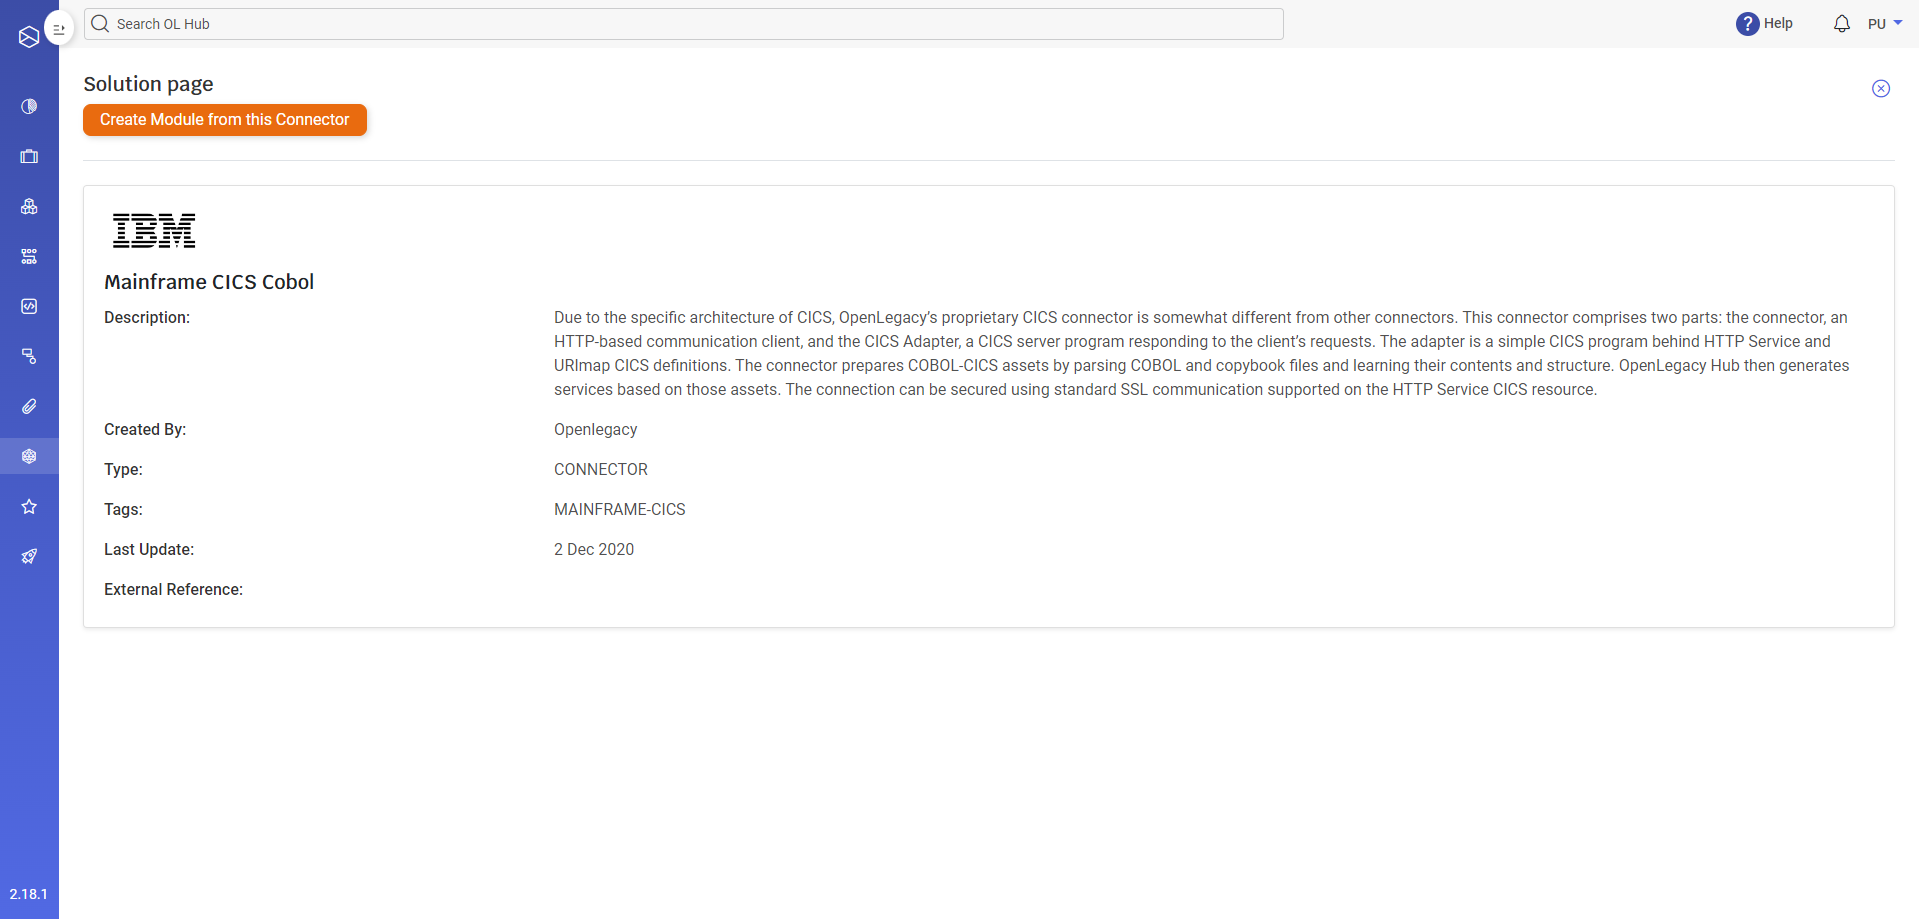
Select the desired Connector:
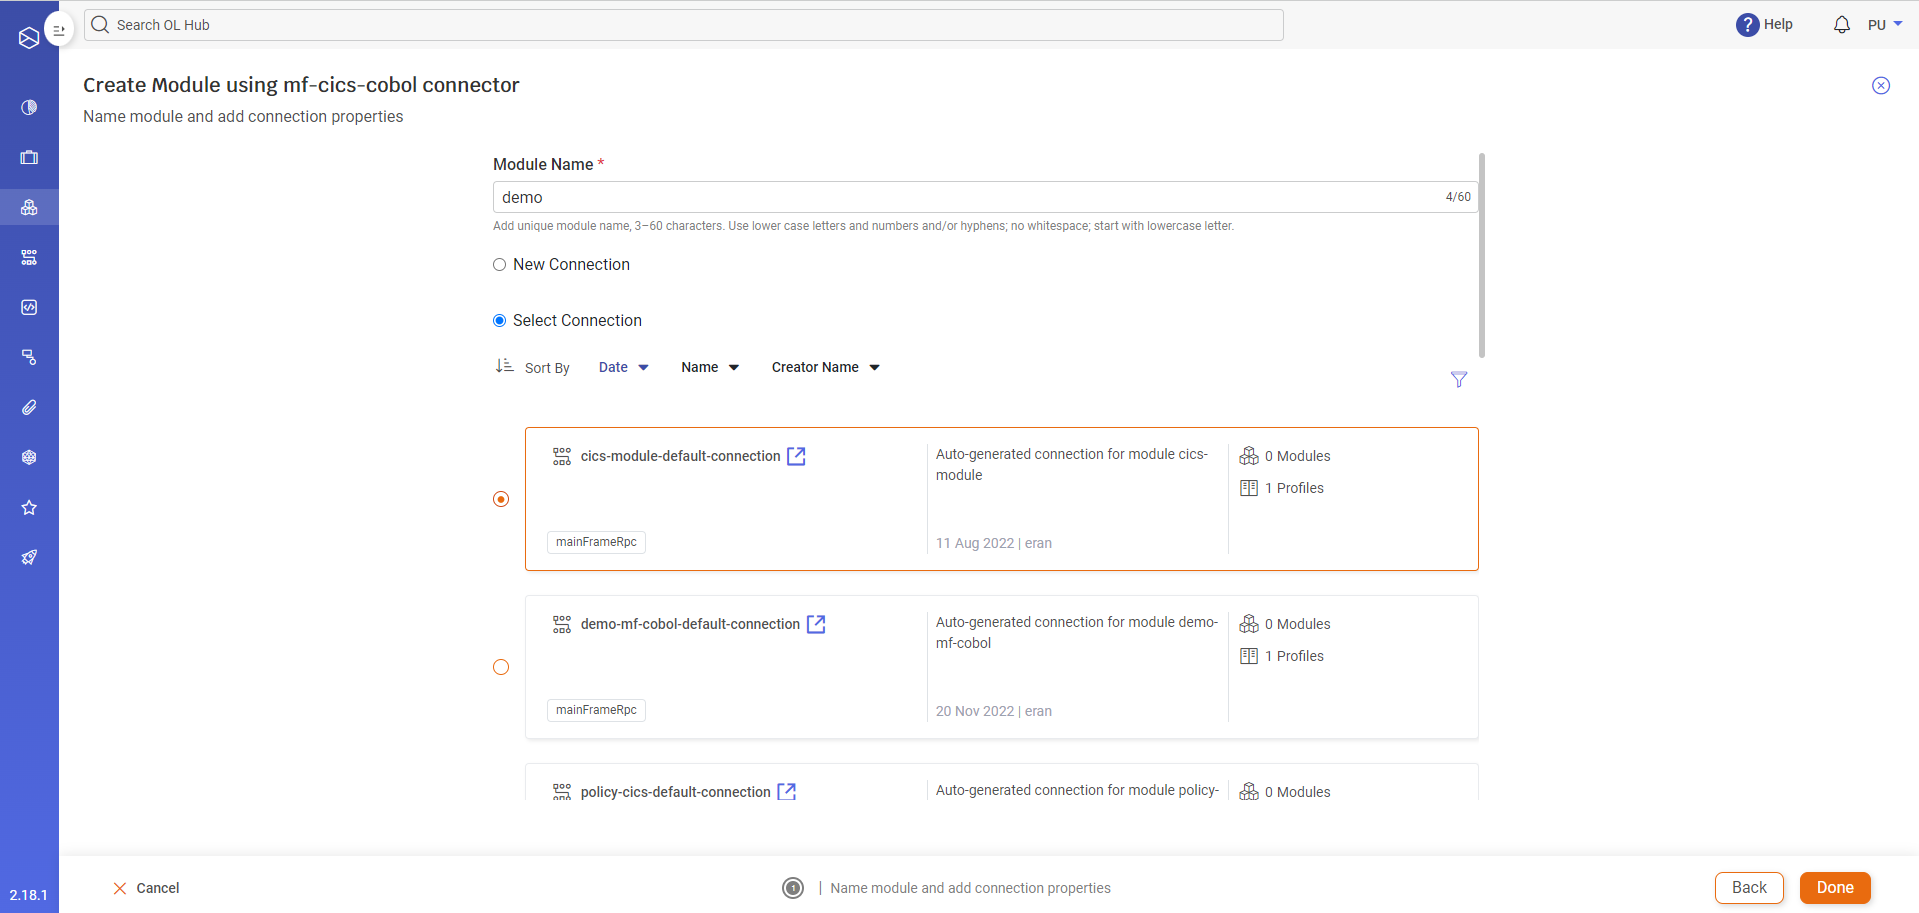
Name and Select/Define the Connection Properties
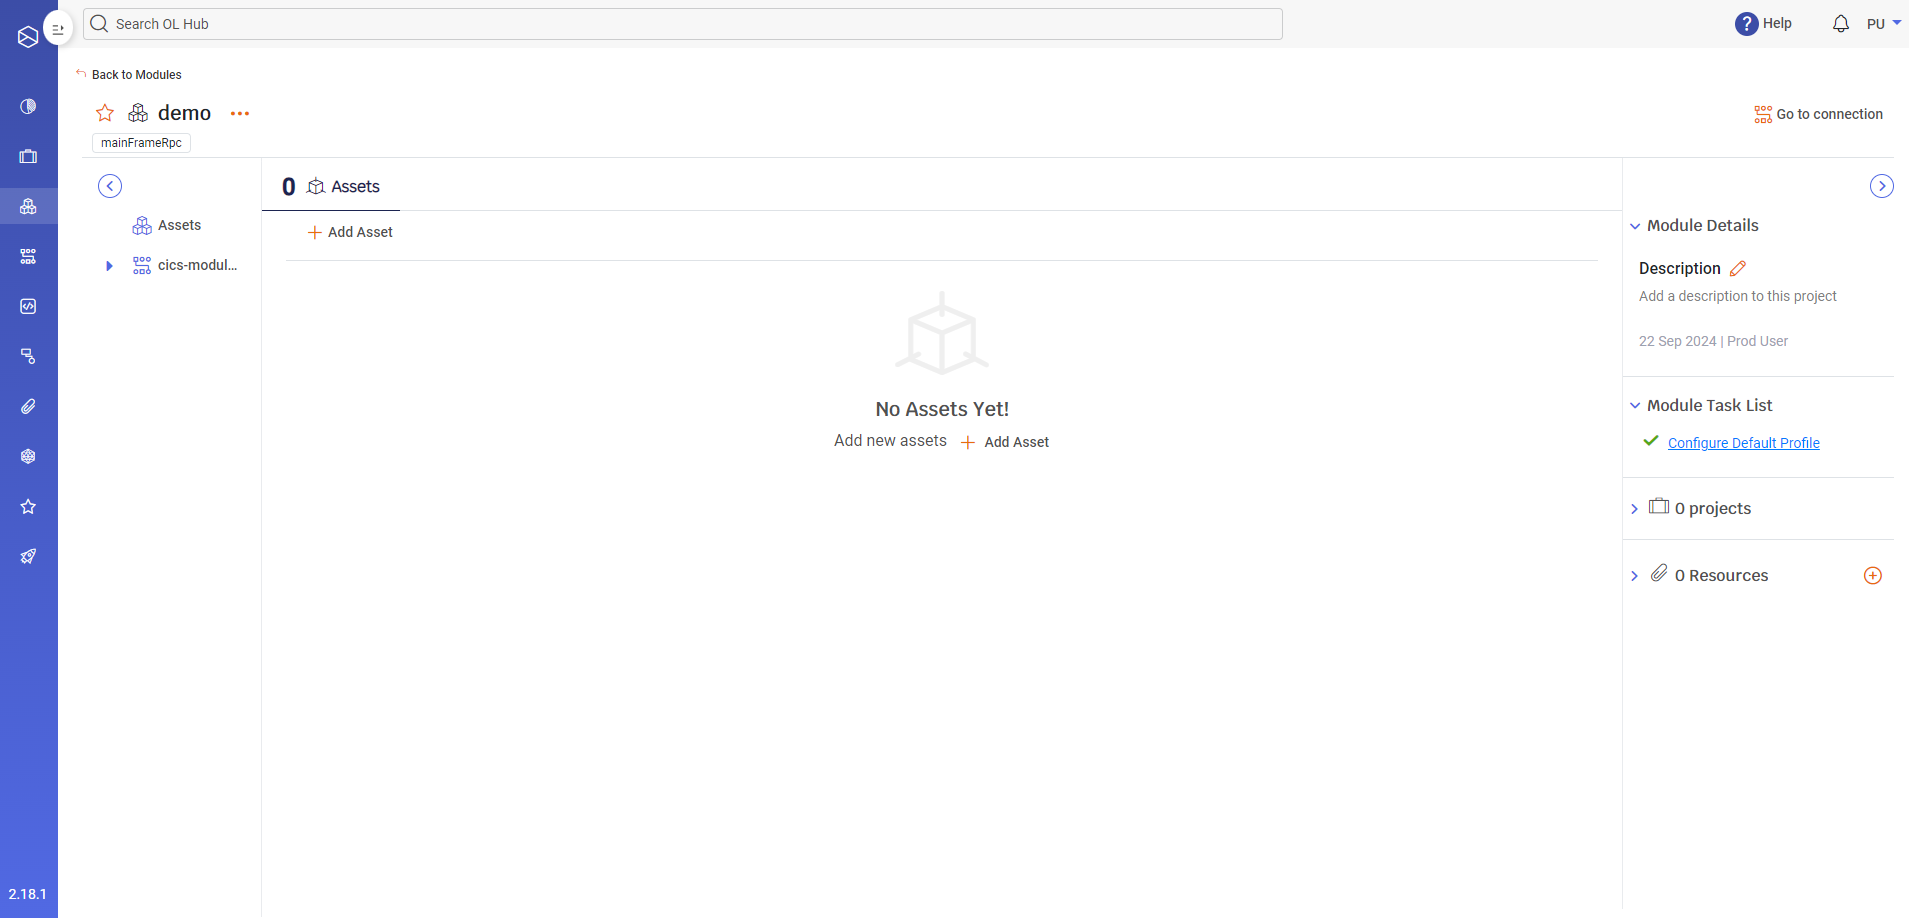
And land on an empty Module
Step 2: Test connection to the Data Source
After you added a new asset metadata file to the module with the ol add command, you can continue to the next step of ensuring that the connection parameters at your disposal establish a proper connection with the business operation on the remote data source. If the connection attempt is successful, the command writes the connection properties values in module.json.
You can perform this step using either the ol add command or the ol test connection command. For example, when you use a connector as part of the ol add command that does not support remote fetching, you have to use a locally stored data source. In this scenario, you don't have to pass connection property values to ol add because the command does not reach out to a remote location. However, if you do not pass the connection properties with the ol add command, you must pass them with the ol test connection command, or else module.json $default connection profile key would remain without values.
The ol test connection command accepts as option values the connection parameters of the remote data source. Connection parameters are dependent on the connector type. For example, a mainFrameRpc connector type has different connection properties than an as400Rpc connector type.
To display the connection properties of a connector type, run the add --help command from inside the module folder.
After you have ascertained the connection properties and their values , you can run ol test connection:
-
Run the ol test connection command from inside the module folder root:
> ol test connection --base-url mainframe.openlegacy.com --port 12345
--uri-map /ol/demos
$ ol test connection --base-url mainframe.openlegacy.com --port 12345 --uri-map /ol/demos -
Display module.json from the root of the module folder:
> more module.json$ more module.json -
Review module.json.
{
  "id": "020c6522-1ee5-49de-8722-aba917bc5c87",
  "moduleName": "cics1",
  "connectorName": "mf-cics-cobol",
  "connectorVersion": "1.36.0",
  "profiles": {
    "$default": {
      "baseUrl": "http://192.86.32.238",
      "port" : "12345",
      "uriMap" : "prod/latest",
      "codePage" : "CP037",
    }
  },
  "type": "mainFrameRpc",
  "dtVersion": "1.36.0"
}
As you can see, the module.json $default connection profile key is populated with the connection properties.
A Connection profile enables you to conveniently reuse connection properties with ol test connection or ol add. You can create multiple connection profile per module.
Step 3: Add an asset to the module
After you created a module based on a selected connector, you can continue on the path of creating an asset metadata file for a given remote data source.
Via the CLI
The ol add command does just that. With the help of the module's connector, it accesses the data source, analyses its logic, structure and format, and then parses it to create the asset metadata file.
The ol add command accepts as option values the data source name and the data source connection properties. If the data source is on a remote server, the ol add command uses the connection properties to connect to the server and fetch the data source. If the data source is stored locally, the command reads the data source's local path and name from the --source-path option.
- Run the ol add command from the module folder root and pass it the source data path and file name. In this example, the source data file name is OACTCS9.cbl:
> [module-name]> ol add [--source-path .\\resources\\OACTCS9.cbl
--program-path OACTCS9]
$ [module-name]> ol add [--source-path .\\resources\\OACTCS9.cbl --program-path OACTCS9]
After the command runs successfully, the new asset metadata file is ready. The command creates a new parent folder called assets and under it the asset folder carrying the asset name. In our example, the name of the asset folder is OACTCS9 and it contains the asset metadata file OACTCS9.json.
-
Go to the assets folder.
> [module-name]> cd assets$ [module-name]> cd assets -
From inside the assets folder go to the asset folder.
> cd OACTCS9$ cd OACTCS9 -
Display the contents of the asset folder.
> [asset-name]> dir$ [asset-name]> dir
The asset folder (in our example, the OACTCS9 folder) contains the asset metadata file called OACTCS9.json and the test_data folder.
The test_data folder contains resources for testing that the asset metadata file can communicate with the backend service. More on this when we discuss the ol test asset command in the following steps.
Step 4: Test the asset
After you have tested the module's connection to the remote data source, perform another important test, this time, using the ol test asset command.
ol test asset simulates the request-response interaction that takes place between OpenLegacy and a remote business operation in a standard production use case. The successful completion of the ol test asset command validates the operational readiness of an asset metadata file before it is pushed to the OL Hub.
The test resources required for ol test asset are already in your module folder under the test_data/case-1 folder. They were placed there by the ol add command you executed earlier.
Let's review the files.
- From your module folder root go to the assets/items/test_data/case-1 folder and display its contents:
case-1> dircase-1$ ls
The contents of the case-1 folder are displayed:
in.json metadata.json out.json- Open in.json in a text editor.
case-1> notepad in.jsoncase-1$ nano in.json
in.json contains the information sent to the remote business operation. It consists of the input keys and values that the service requires.
{
  "dfhcommarea" : {
    "custId" : "",
    "creditCards" : [ {
      "cardNumber" : "",
      "cardType" : "",
      "cardLimit" : 0,
      "cardUsage" : 0
    }, {
      "cardNumber" : "",
      "cardType" : "",
      "cardLimit" : 0,
      "cardUsage" : 0
    }, {
      "cardNumber" : "",
      "cardType" : "",
      "cardLimit" : 0,
      "cardUsage" : 0
    }, {
      "cardNumber" : "",
      "cardType" : "",
      "cardLimit" : 0,
      "cardUsage" : 0
    }, {
      "cardNumber" : "",
      "cardType" : "",
      "cardLimit" : 0,
      "cardUsage" : 0
    }, {
      "cardNumber" : "",
      "cardType" : "",
      "cardLimit" : 0,
      "cardUsage" : 0
    } ]
  }
}- In in.json, type the values of the custId key:
(412-83254).
Now you are ready to run ol test asset. It has one option, --asset, with the asset name as its value.
- Run ol test asset from the module folder
[module-name]> ol test asset [asset-name][module-name]$ ol test asset [asset-name]
You can see the itemName and description business fields populated with values.
{
  "dfhcommarea" : {
    "custId" : "412-83254",
    "creditCards" : [ {
      "cardNumber" : "4580123412341234",
      "cardType" : "GOLD",
      "cardLimit" : 5000,
      "cardUsage" : 1783
    }, {
      "cardNumber" : "4580002377826452",
      "cardType" : "PLATINUM",
      "cardLimit" : 10000,
      "cardUsage" : 567
    }, {
      "cardNumber" : "4580887386255265",
      "cardType" : "BUSINESS-G",
      "cardLimit" : 7000,
      "cardUsage" : 4873
    }, {
      "cardNumber" : "4580108372533424",
      "cardType" : "BASIC",
      "cardLimit" : 1000,
      "cardUsage" : 0
    }, {
      "cardNumber" : "4580773685986244",
      "cardType" : "FT-MEMBER",
      "cardLimit" : 2000,
      "cardUsage" : 600
    } ]
  }
}
Via The UI
Click on Add Asset button
The Add Asset Wizard starts
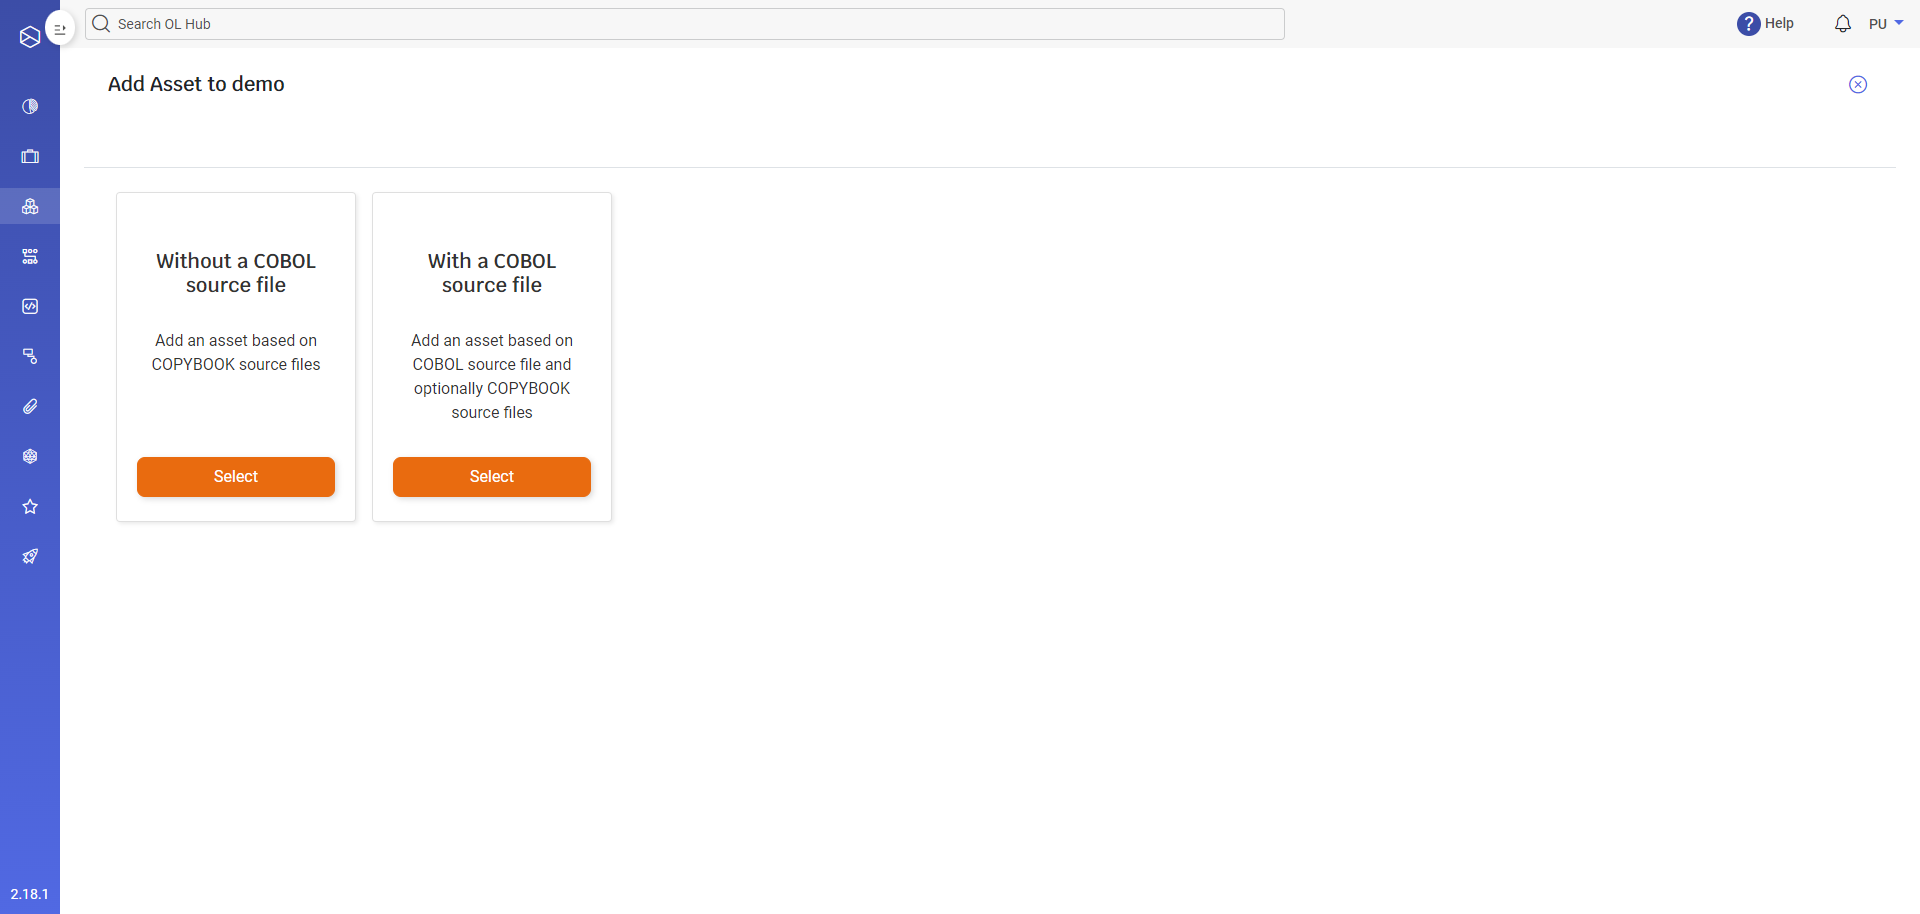
Select the options per the backend connector and your use case
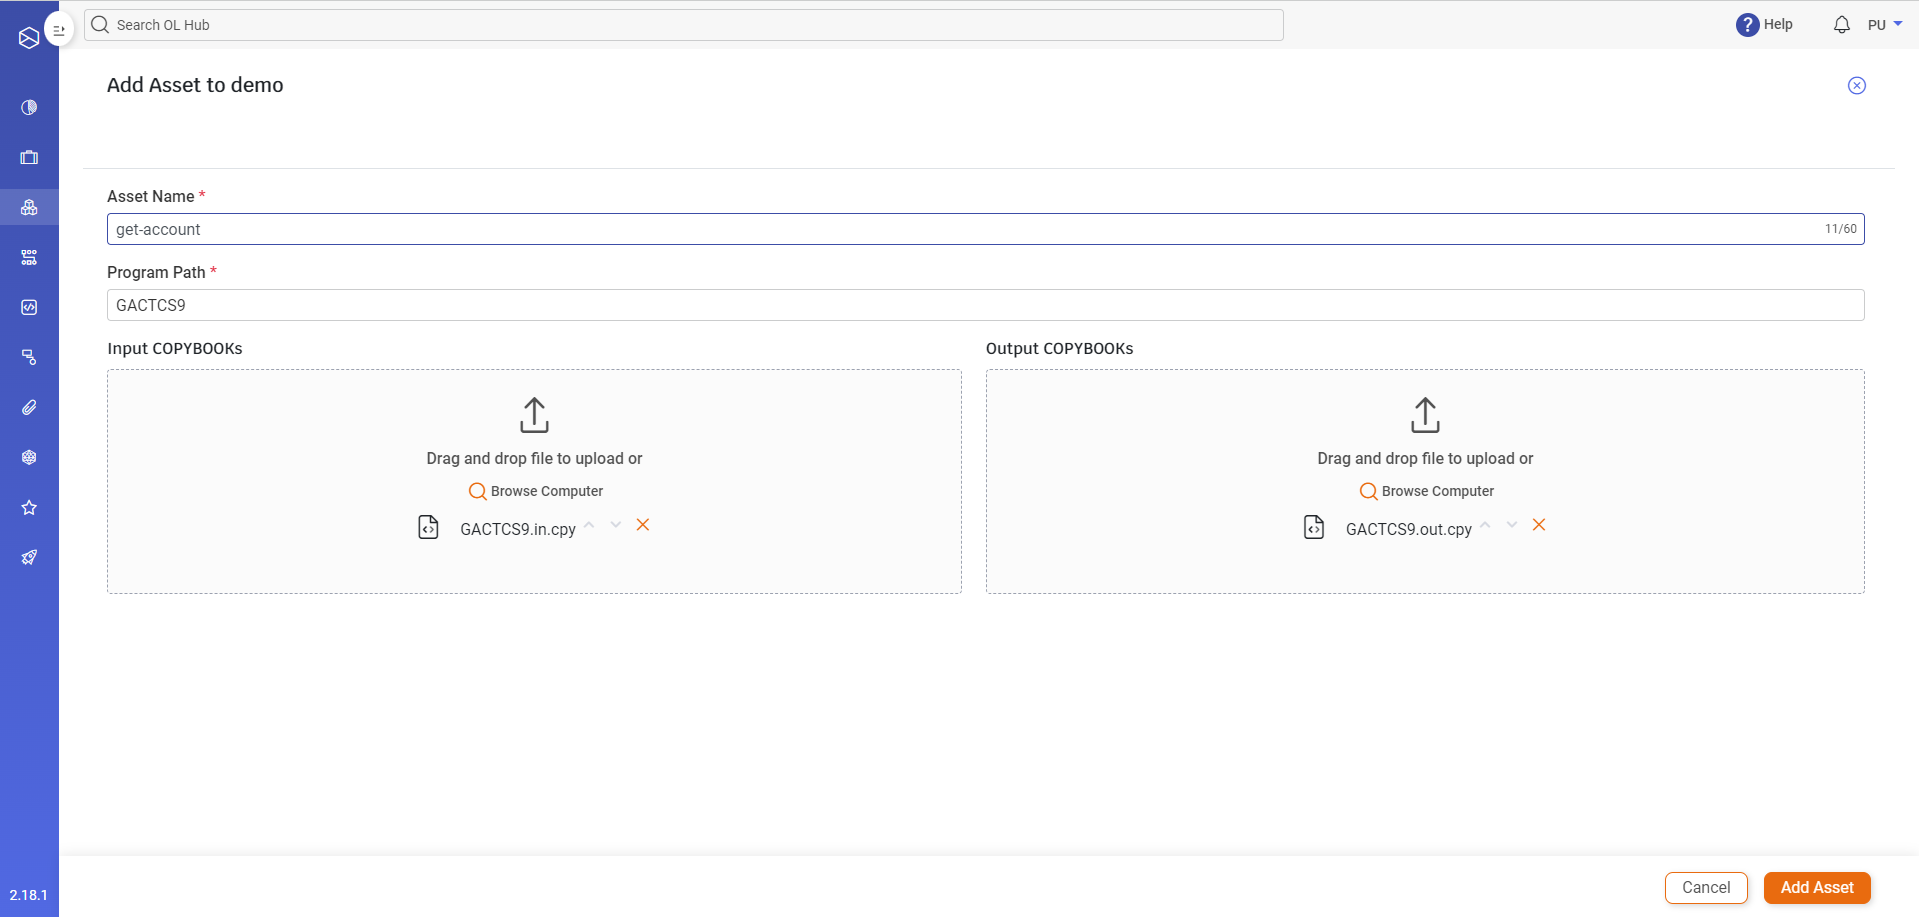
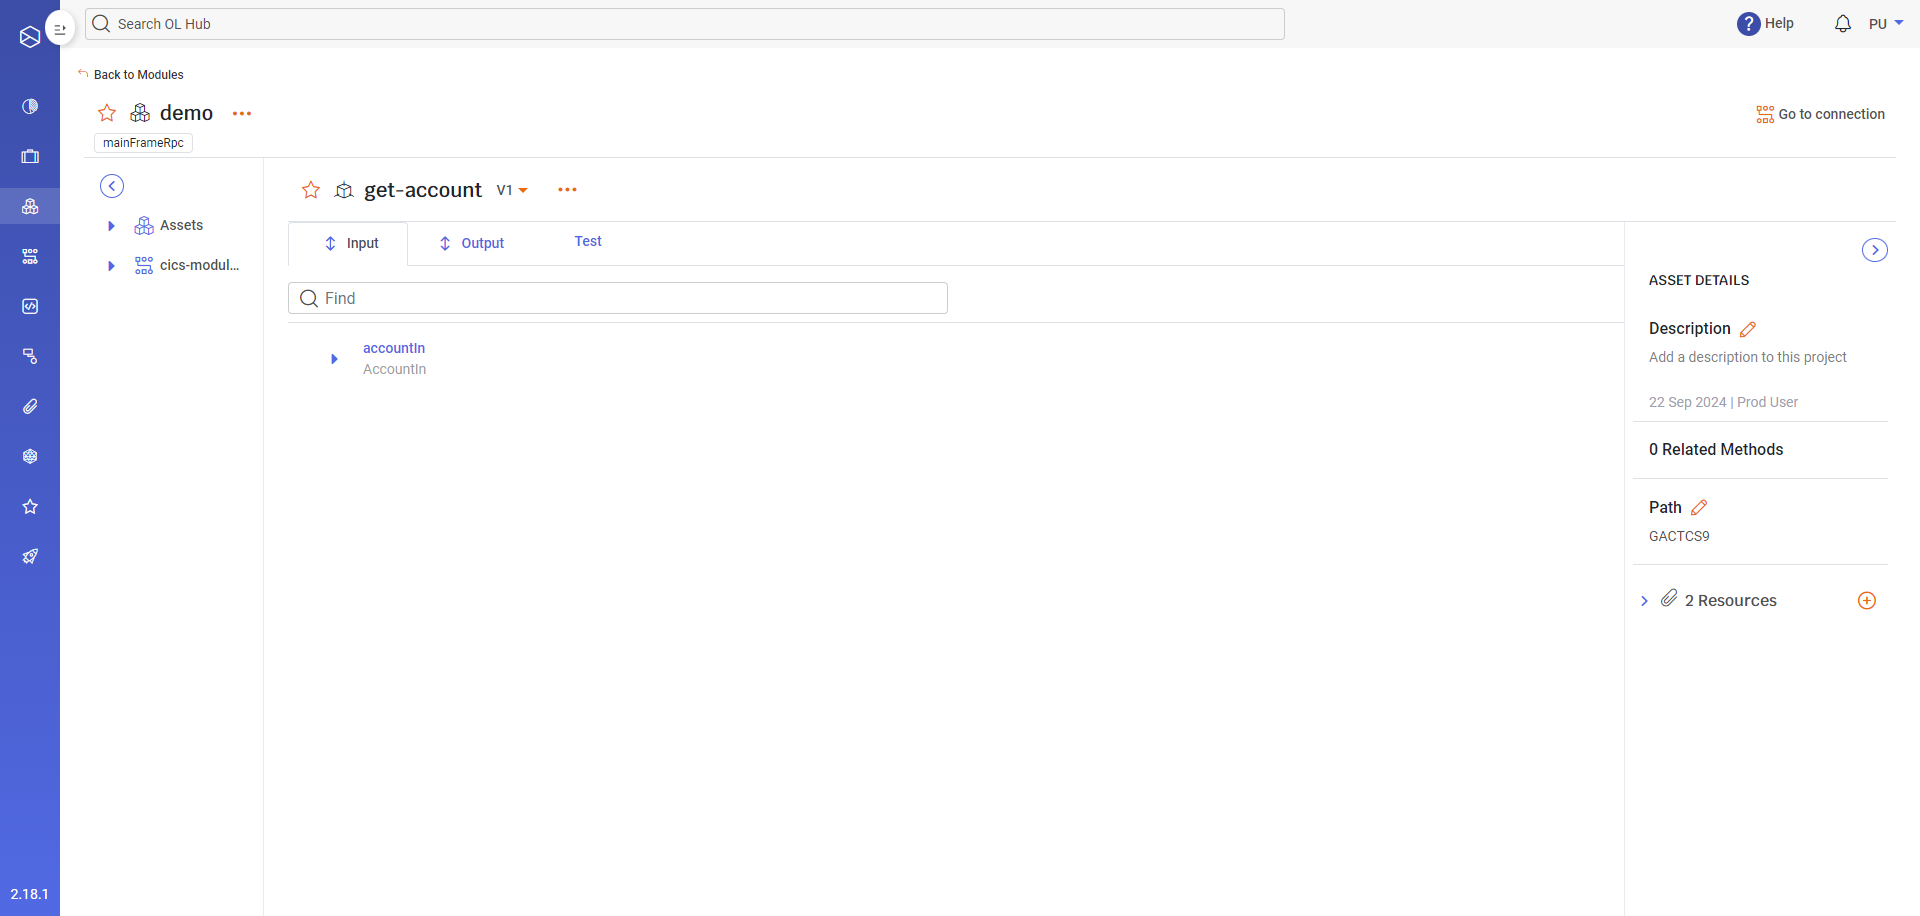
Land on the new asset
Step 5: Push the module to the OL Hub
Now that you are sure that the module is operating as it should, that the connecting properties are accurate, and that the remote data source is responding with the correct data, you can perform the last step in the process and push the finalized module to the hub.
Make sure you are logged in to the OL Hub before executing the ol push module command.
-
Run the ol push module command from the module folder root.
[module-name]> ol push module[module-name]$ ol push module -
The CLI displays the command success status.
Module demo_module pushed successfully to the HUBStep 6: Continue in OL Hub
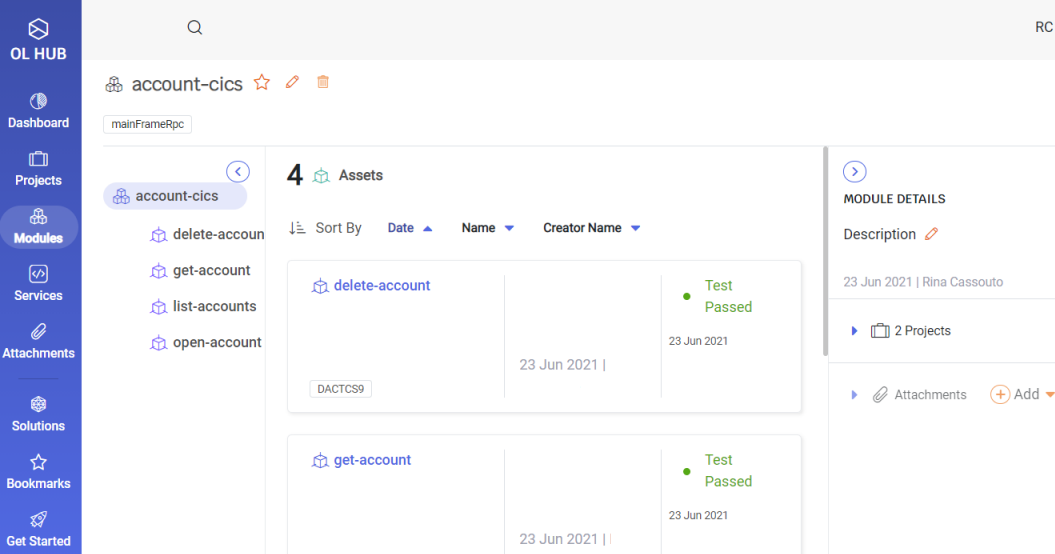
Your module is now on the OL Hub and can serve as a foundation for generating services for your data consumer.
Review the new module with assets in the OL Hub.
We recommend renaming assets to meaningful names:
To add a module to the project:
-
On the left pane, click Projects and then select the existing project or create a new one.
-
In the Projects page, click Add Modules.
The list of all the existing modules appears on the Add Modules to Existing Project page. -
Select the module(s) that you want to add to your project and click Add to Project.
Now you can continue setting up your project and generating services in the OL Hub.