Creating Microservice-based APIs with OL Hub
The API development process in OL Hub is the process of creating a project. At the end of this process, you generate a service and can start using your new API.
A project and a service are microservices or groups of microservices related using specific business logic.
The difference between them is that the project is a design-time state of the API, while a service is a run-time state with some configuration capabilities.
Creating a project includes two main stages:
| Project creation stage | Description |
|---|---|
| Creating modules | Each project includes one or more modules. The module is an API component that connects directly to the data source. It is comprised of: • One or more assets: An asset is an input/output model of a legacy source file in JSON metadata format. • Connector: For every data source type, there is a unique connector, and for every data consumer type, there is a unique service generator (referred to as a solution). The connector is designed to work with a specific data source type and can connect to the data source, locate the relevant business operation in the data source, understand the business operation code, and extract from the code the business information fields it contains. • Configuration properties |
| Creating a contract | A contract is an API component that determines how the business fields from the legacy system are exposed to the data consumer. |
The following tutorial takes you through the entire process of developing an API with OL Hub.
-
Create a project
The first step in developing an API in OL Hub is creating a project that includes the components of the API that you are planning to create.
To create a new project:
-
In the left pane, select Projects.
-
On the Projects page, click Create New Project and type a meaningful project name
then select the project use case and backend module.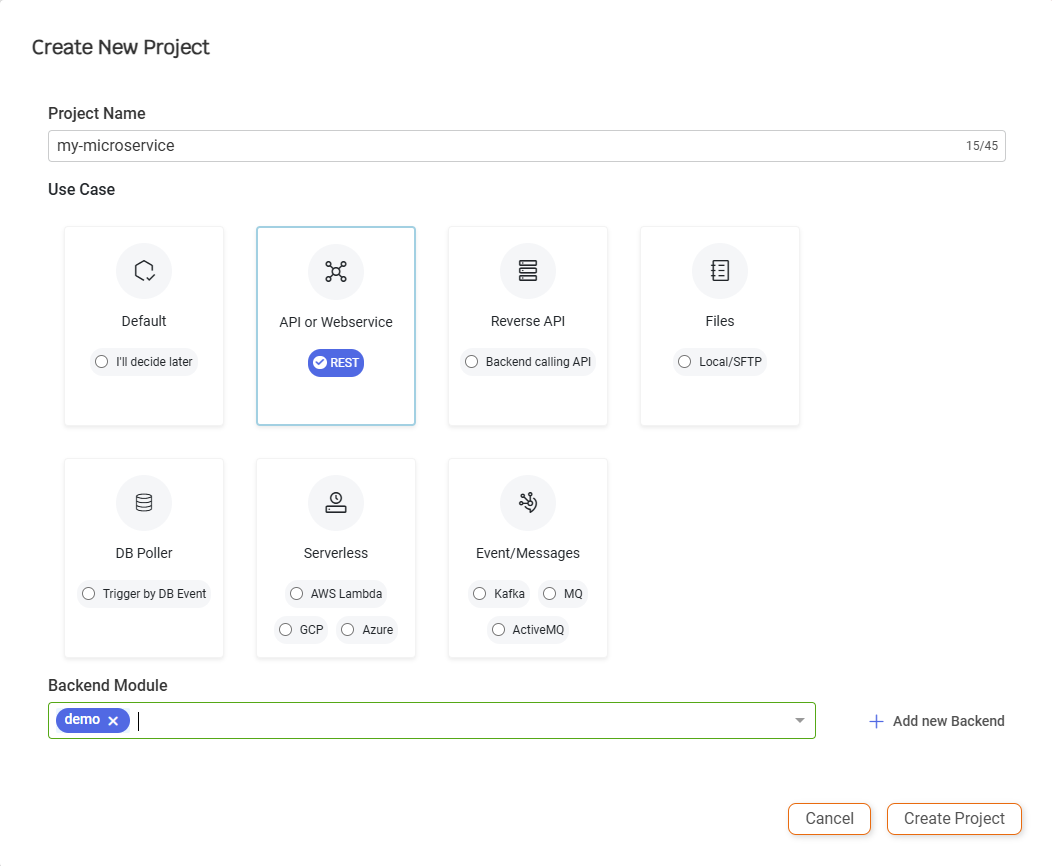
Create Project Use Cases
Now you can start setting up your project.
-
-
Create a module
For every type of data source, there is a specific type of connector. For this reason, selecting a connector is the first step in connecting to a data source and extracting its business data.
Selecting a connector is performed in the context of creating a new module in the OL-Hub UI or in the OL-Hub CLI. The module serves as the container for the extracted data-source business fields and contains a configuration file that specifies its connector type and the data-source connection properties. The module design time (parsing) and runtime are based on the connector capabilities.
-
Test connection to the data source
-
Add an asset to the module
After you have created a module and selected a connector for a particular data source type, you can access the data source and extract its business information. This is done by specifying the business operation on the data source to target and providing the connection properties to the data source, for example, the data source URL address and port number.
The connector reads the connection properties and fetches the business operation from the data source. It then parses the business operation code with a data source-specific parser and extracts the business fields.
The extracted business fields of a single business operation constitute an asset. A module can have one or more assets. In most cases, each asset has the same name as the data source business operation name. The fields are registered in a JSON file inside a subfolder carrying the
asset name under the module root folder. -
Test the module assets
The asset folder also includes testing resources. Using these resources, you can test whether the module and the assets are well constructed. The testing resources enable you (using the test asset command) to run the business operation on the data source, give it an input and see if it returns an expected output. The test can give immediate feedback on the asset capacity to run the data source operation and return the correct business fields.
After the assets are created and tested, you can upload the module, including its assets and test results, to the OL Hub (using the push module command). At this point in the workflow, you move from the CLI tool to the OL Hub web application for the next step.
-
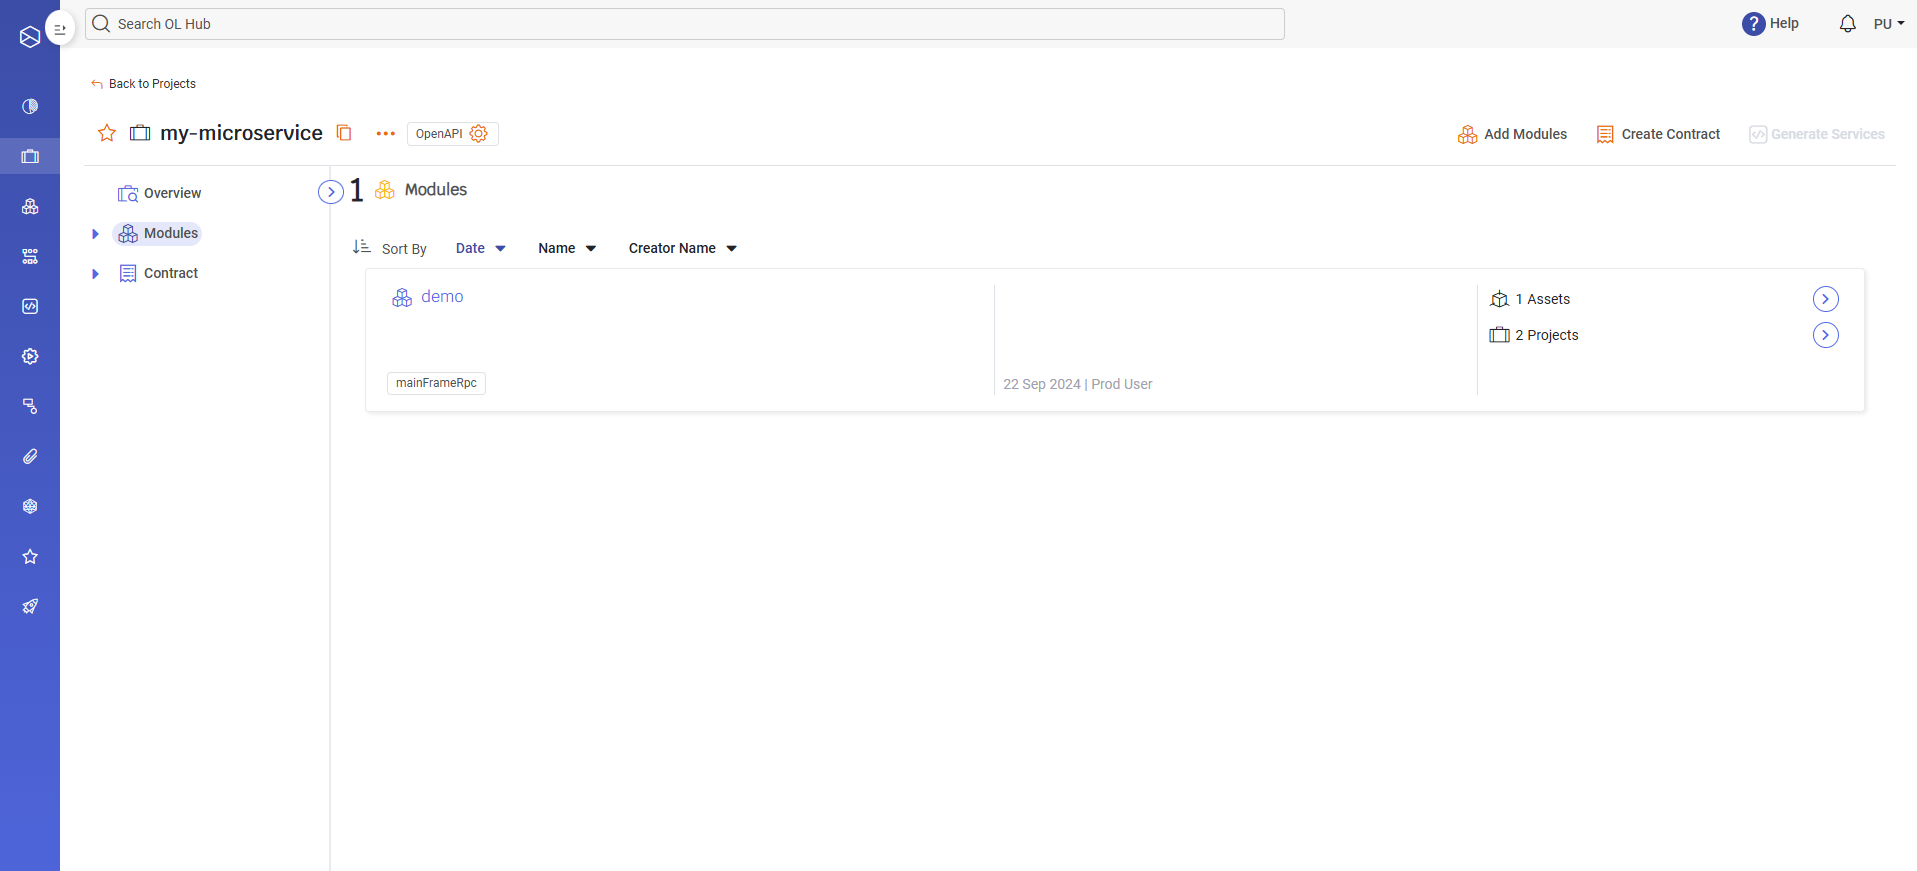
Add modules to a project
At this point, you have a module that you just uploaded to the OL Hub, and that contains one or more tested assets. Now you can include the module in an OL Hub project that you have created in Step 1.
-
Create a contract
A contract defines rules that determine which business fields are exposed to the data consumer and how they are exposed.
To create a contract:
-
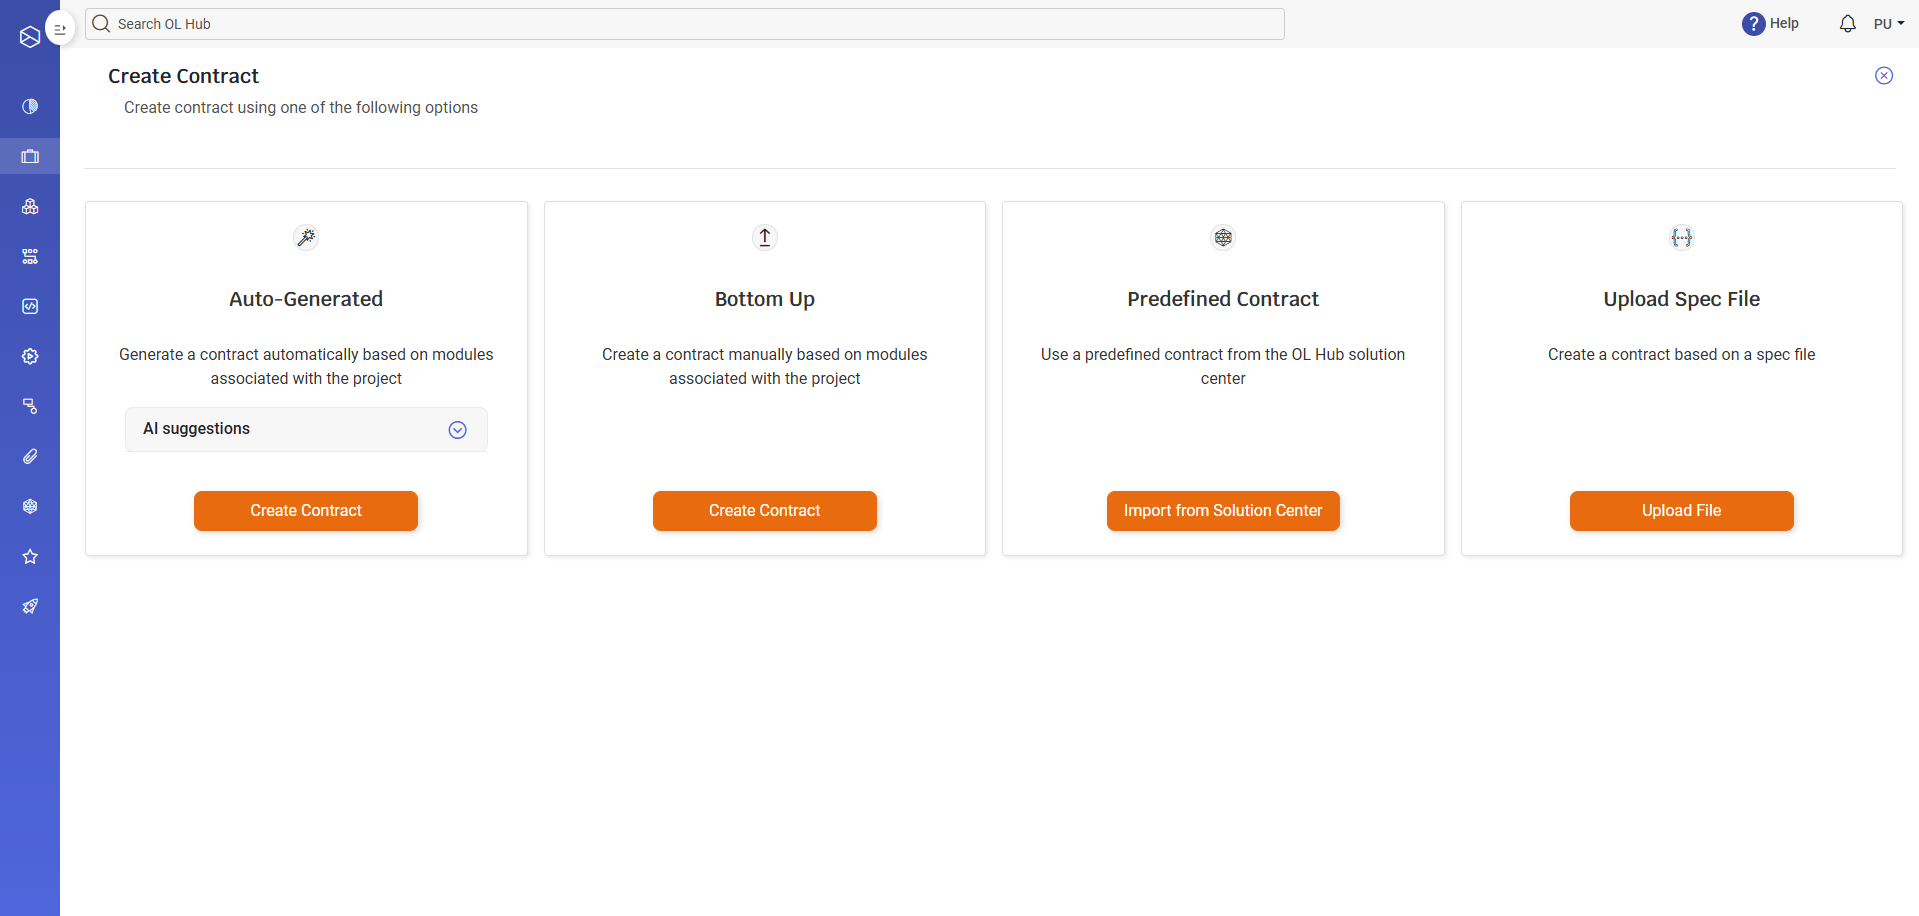
In OL Hub, select the project for which you want to create a contract and click Create Contract.
-
| Contract Type | Description |
|---|---|
| Auto-Generate | - Generates contracts automatically - The output contains exactly the same business logic as the input from the legacy system |
| Bottom Up | - Enables generating a custom contract. - You can implement business logic by changing the flow, defining custom mapping, adding entrypoints |
| Predefined Contract | - Generates contracts predefined by OpenLegacy |
| Upload Spec File | -Create a Contract based on a spec file |
For example, the asset you added to your project includes all the business fields extracted from the business operation. There are use cases, however, that the data consumer does not need particular business fields. In the contract, you set the rules that determine which asset business fields will get passed over to the data consumer and which will not.
In the following example, the contract determines the fields that will appear in the digital form for a fast process of opening a bank account. The original legacy system sends a long list of fields and the new digital form contains only Customer Id, Customer Name, and IBan.
To create a contract with custom flow:
-
In the Bottom Up section, click Create Contract.
-
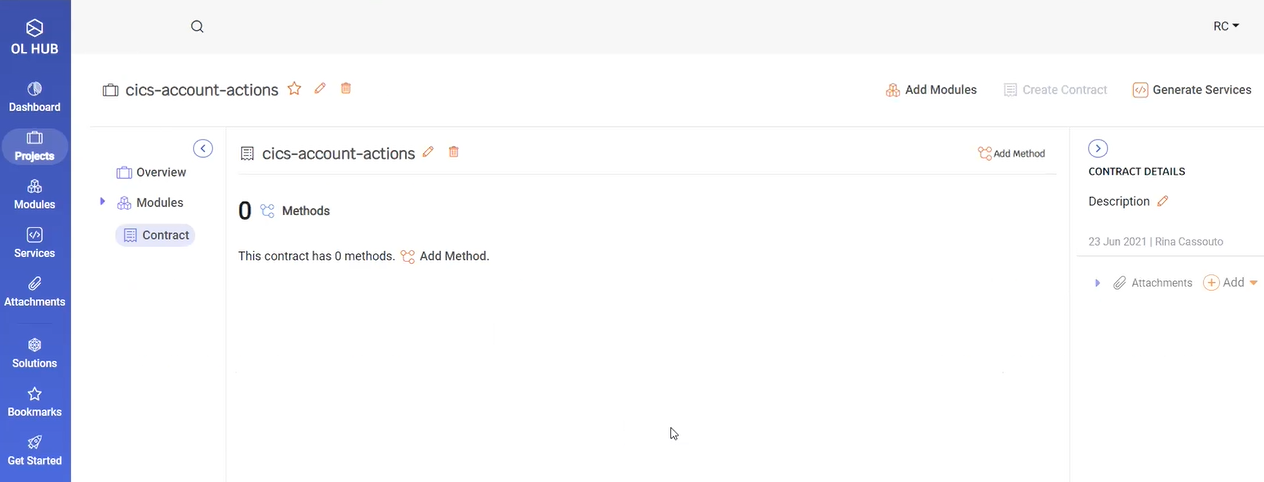
Click Add Method, type the name of the method that you want to add to this contract, and click Done.
The new method, open-account-method, appears with the default flow map. Now you can start creating a custom flow.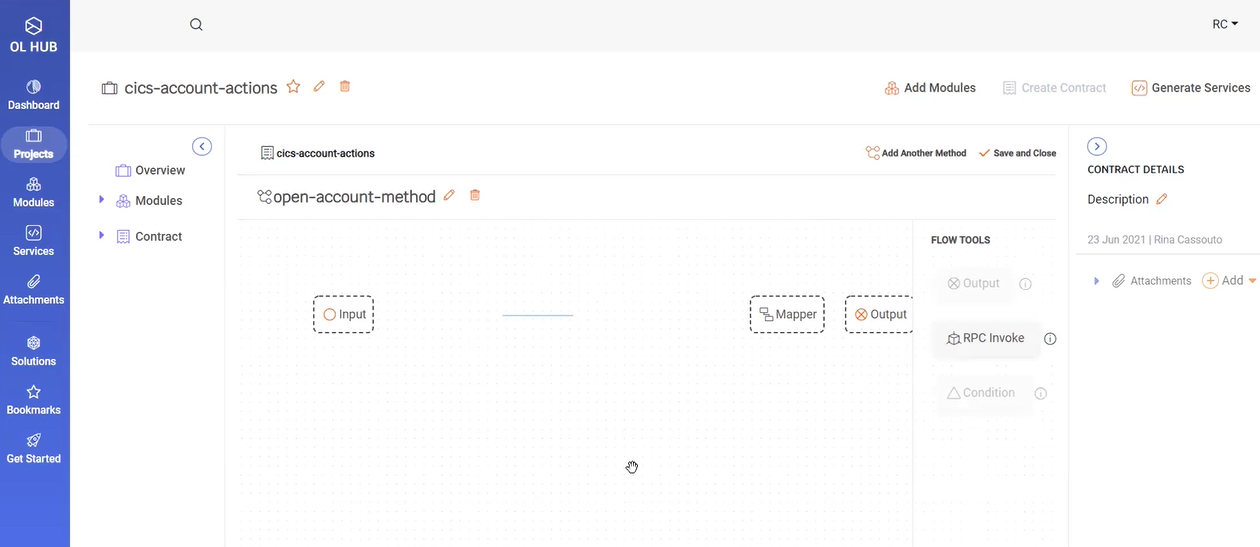
-
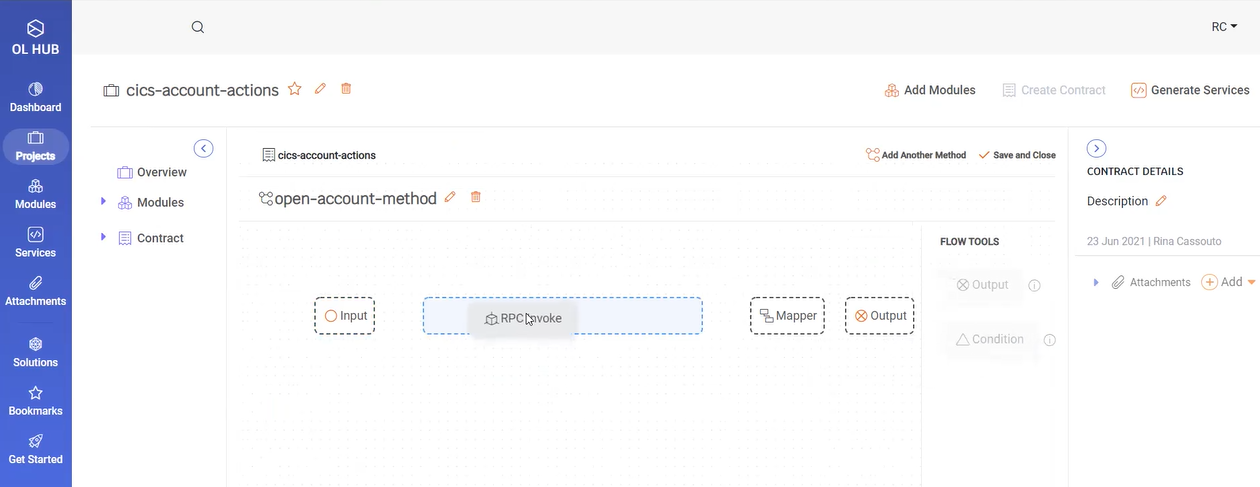
To add an asset to the map, drag the RPC Invoke flow element into the blue rectangle on the map.
-
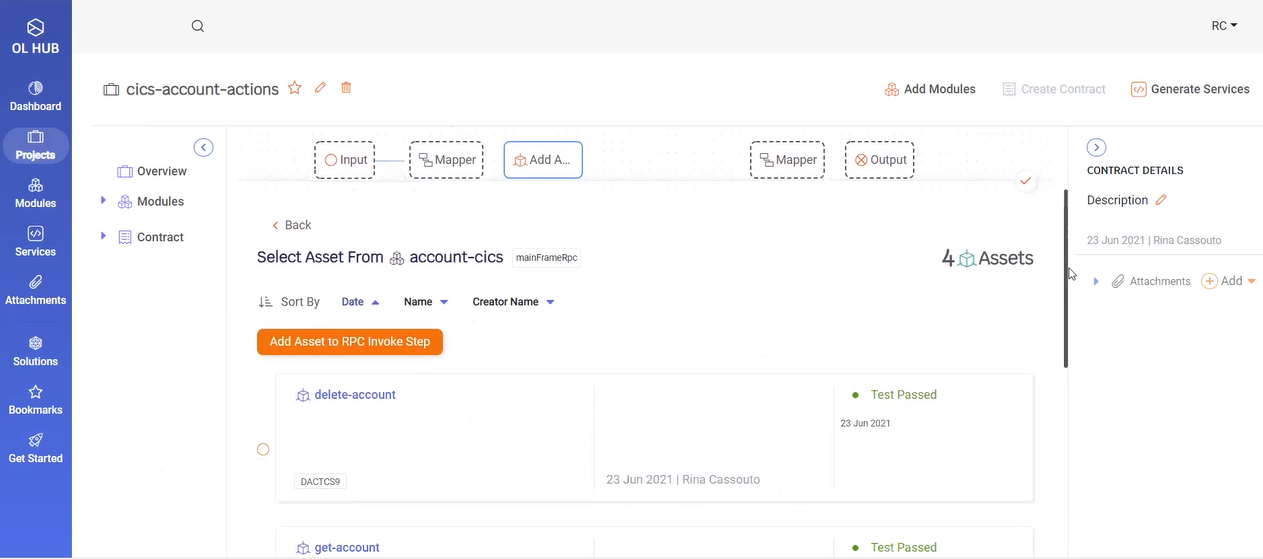
Click Add Asset and select the module that contains that asset.

-
Select the asset that you want to add and click Add Asset to RPC Invoke Step.
-
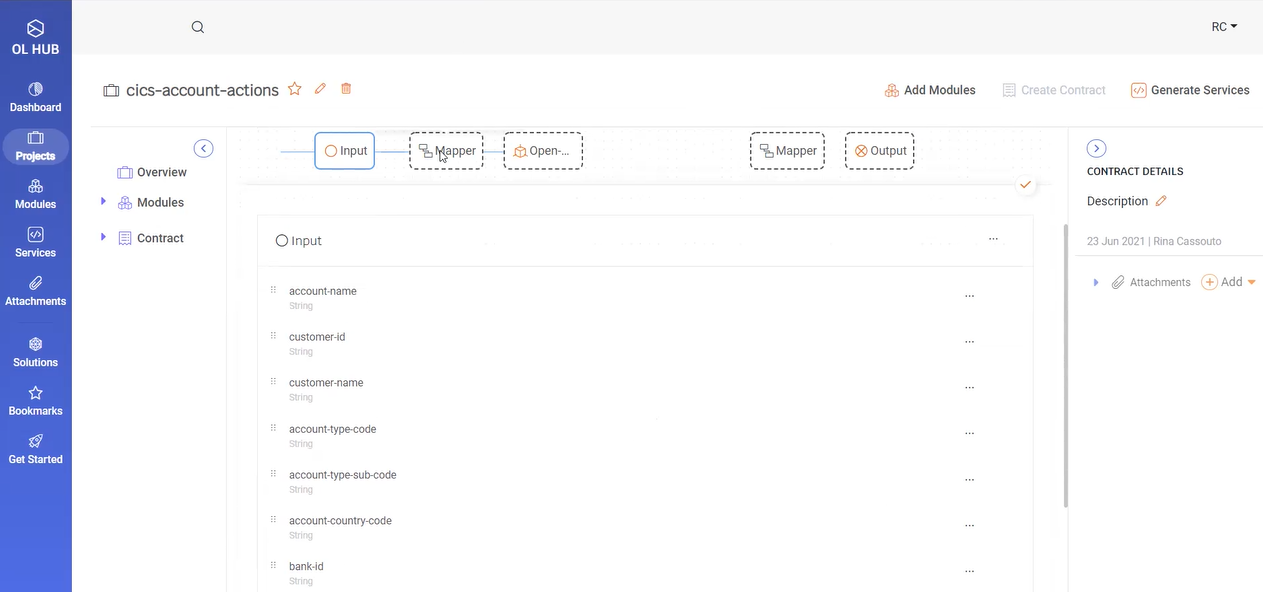
Click on the input mapper and view the open account fields as they appear in the legacy system.

-
To reflect the custom data sent by the legacy system, click Input on the map and define Field Name and String Type for each field.

-
Map the input fields that you have defined based on the data you received from the legacy system and click V next to the map.
The mapping of the input must reflect exactly the fields received from the data source.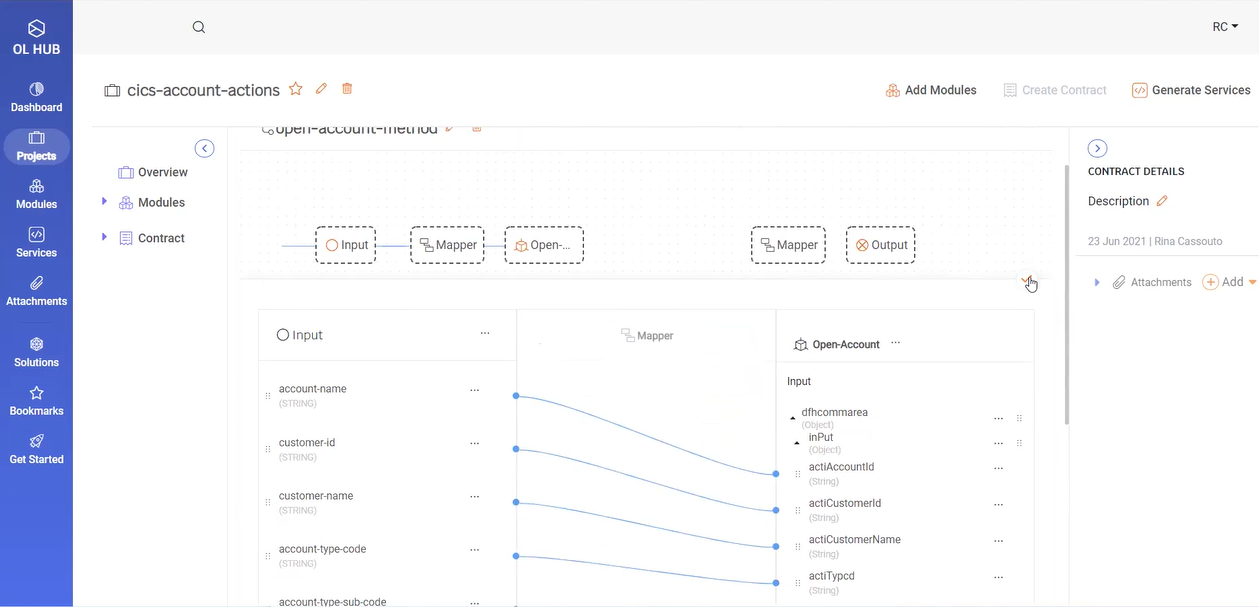
-
Click Output, define the output fields that the data consumer requires, and click V.
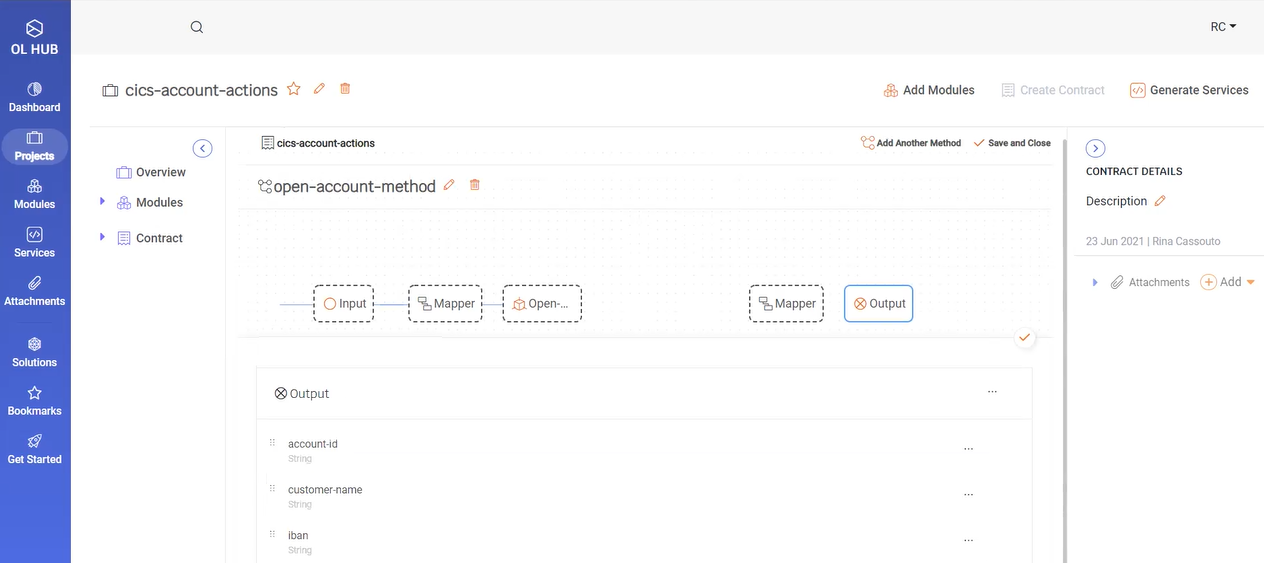
-
Map the output fields that you have defined to the fields from data source and click V.

-
Optional: Add expressions to mapped fields.
-
Click Save and Close. The contract is ready.
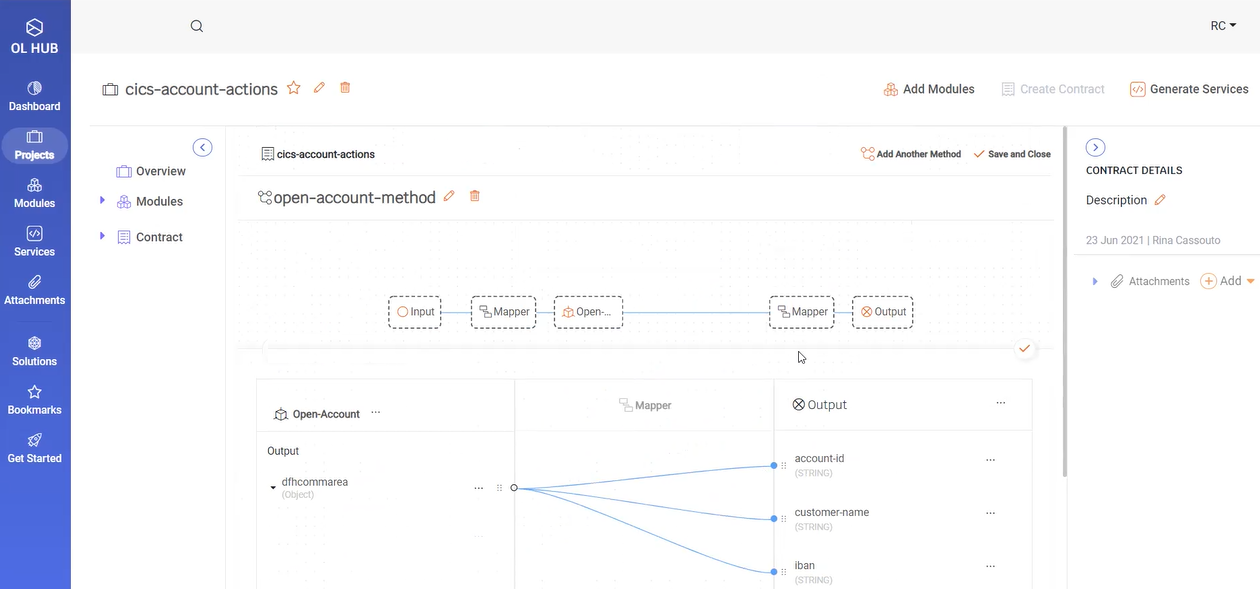
Now you can generate a service. -
Generate a service
The last step in the OpenLegacy workflow is the selection of a service generator that matches your data consumer. You can create several services from the same project by using different generators. The generator will create a service that, depending on your data consumer, has a specific application framework, architectural constraints, or web service design.
The service is generated to match the data consumer but it also includes data related to the data source. Since the service translates API requests coming from the data consumer to API requests going to the data source, it utilizes the data source connection properties originating from the connector.
When the service is ready, you can download and merge it into your data consumer codebase.
To generate a service:i. Open the project from which you want to generate a service.

ii. Click Generate Services.
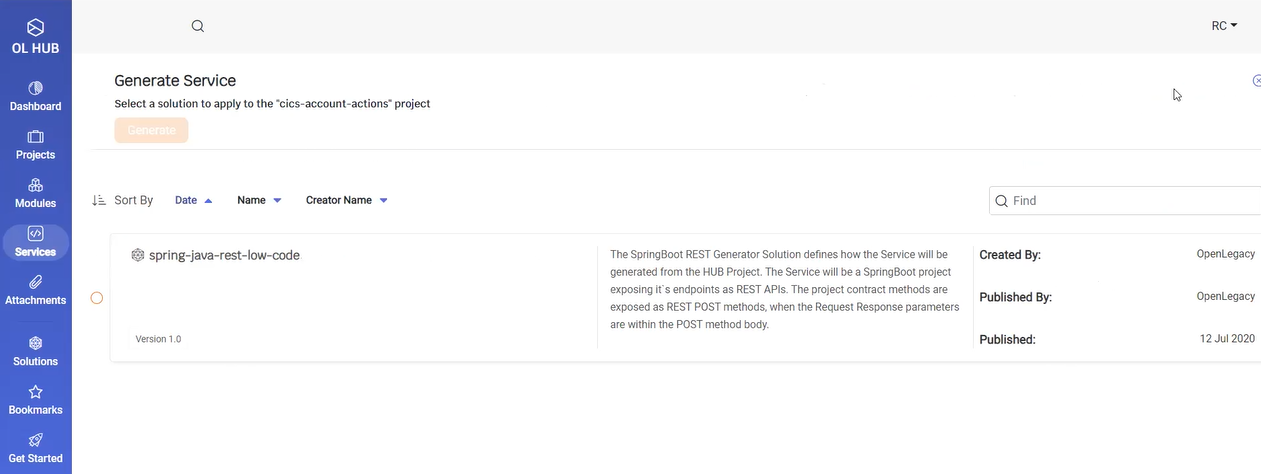
iii. Select spring-java-rest-low-code and click Generate.

The new API is ready. You can now download the service.